My Washing Machine Aboard – Forget Bucket Laundry!
“Fine, I will live on a boat, but I am not washing clothes by hand.”
To find the best washer for our budget, I spent a lot of time reading, researching, asking in forums and watching videos. Here is everything you need to know.
In all fairness, the conversation above did not quite go as smoothly. My “fine” took a year and a half, but that’s a different story.
Oh, if you prefer to watch my laundry system, here it is:
Get a washer and spend your time on more enjoyable things. For example:
Our FREE 5 Day Liveaboard Guide
(5 e-mails, 5 short videos, 5 fun worksheets)
None of the links to products are affiliate links. I canceled my affiliate accounts and I do not earn any commission. I only recommend what we like and use.
My Washer
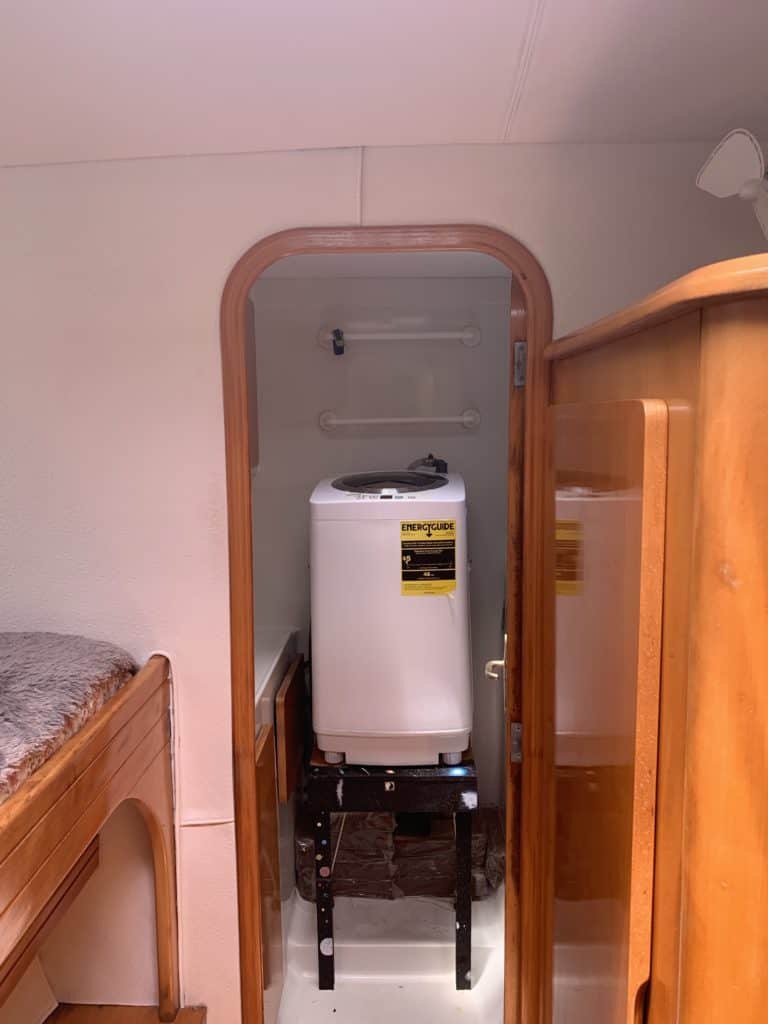
I loved our fully automatic washing machine.

Giantex Portable Washing Machine. Fully Automatic. 8 LBS Capacity
It reminded me of the washers in Europe, which I grew up with – powerful enough to take any stain out of everything. Yet super compact.
We purchased the 8lb capacity and it was perfectly fine for all five of us (with three teens).
It fit well in one of the heads and it never moved during rough passages. Keep reading for ideas how to best set up and use.
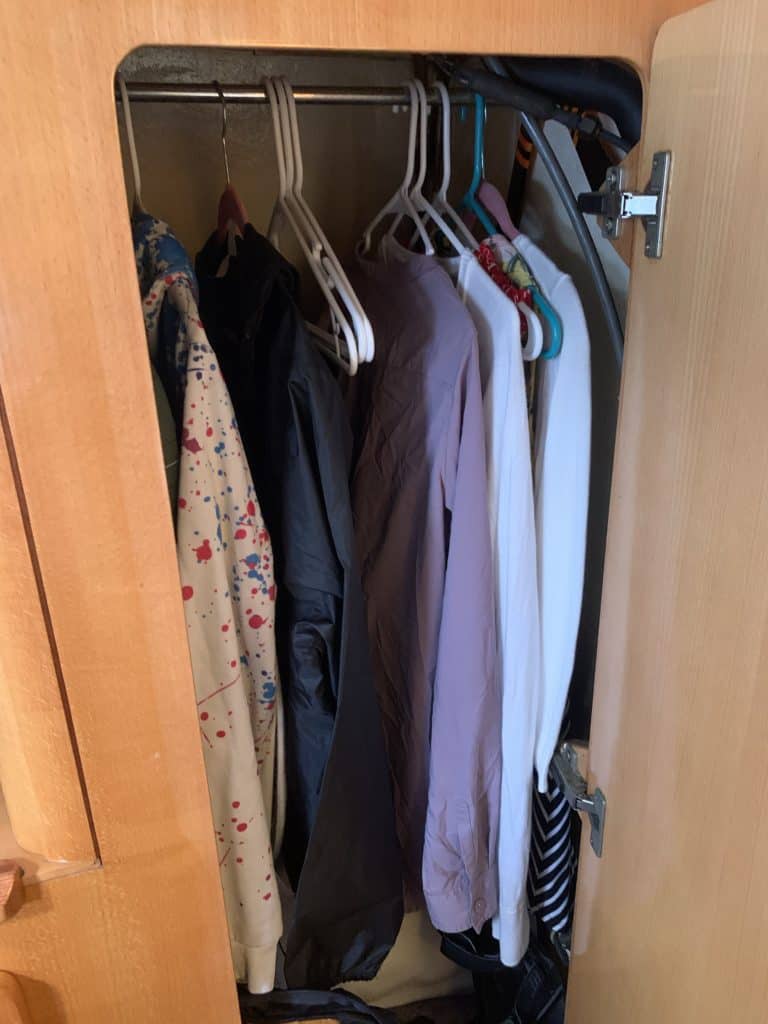
Tip: Choose your clothes aboard wisely. A pair of jean shorts are impractical, take up space and take forever to dry. Here is a great post to help you: 9 Sailing Outfits for any Season and Reason
What is the right washer for your boat?
We lived on a 1995 Privilege 42, with four cabins and four heads. We had to work with the space available.
When considering the type of washer to purchase, keep these in mind:
- Where is it going? Measure the width of the entry to the space.
- Even with a bigger budget, you need to consider space first.
- Can it be securely positioned, so it does not move around?
- Automatic washers have a strong spinning cycle, they vibrate and shake.
- If it leaks, where will the water go?
- Do you need a drying function (hint, you don’t)?
- Will you use a faucet with an adapter, or a more permanent plumbing.
More everyday boating gear:
My Composting Toilet Aboard – Love-Hate Relationship (Pros and Cons).
19 Best Boating Bags. Tips How to Use Them.
9 Sailing Outfits for any Season and Reason
Comfortable Sailing Shoes for Every Boating Need
27 Perfect Books for Boaters.
The Best Washer, if You Have the Space and the Budget
Here is an excellent washer, which checks all the boxes. It was my first choice for a washer, but it was too big.
Sadly, it was not going to work aboard our boat. But I am buying this for our land house:
Miele Automatic Washing Machine. (I am not an affiliate for Miele; they are very popular in Europe and a great quality. None of the regular US brands can compare, sorry.)
Where will it fit?
The best space for a washer, is in one of the heads.
Some boats do come with a space for an in-built washer, but if you need to make space aboard, it will be best to remove one of the heads or install directly on top of it.
We had four heads aboard, and we only used two – I was not going to clean four composting toilets, no, thank you.
Here is a post about the composting head aboard, if you are curious:
My Composting Toilet Aboard – Love-Hate Relationship (Pros and Cons).
Installing the washer in one of the heads is also perfect for when you forget that you were catching the rinse water, and it ends up all over the floor.
I have done it, at least once per week.
Bonus – if you remove a head, to install the washer, sell the head on Facebook. I sold ours in fewer than 24h. We used the space under the stand for coconut coir and shoes storage.
How Much Power Does it Need?
Depending on the system your boat uses, you will need either a 110V or 220V washer.
You cannot run an automatic washer on 12V. They use too much power.
We ran the inverter every time we ran the washer, we did not have a generator, and we only had 800W of solar. It was plenty.
For more tips on sustainable life aboard:
This Sustainable Lifestyle is the Fairest of Them All. 10 Reasons Why Living on a Sailboat Matters.
I did laundry every 2-3 days, at the most. For five of us aboard.
Steps to Conserve Water, Doing Laundry.
A great feature of this washer is the option to pause the cycle and add water. It would not start until filled with water, so if I occasionally forgot about the laundry, it would patiently wait for me.

Here are the steps that conserve the most water. They start after you have done laundry for the very first time, to start the cycle. I always used Medium load.
Step 1 – Fill to start – use saved water from Rinse #1 from previous load.
Step 2 – Start the wash cycle.
Step 3 – Let the first water go – it is the dirtiest one.
Step 4 – Fill with water for the first rinse – use saved water from Rinse #2 from previous load.
Step 5 – Catch the first rinse in a bucket and use as the start water for next load.
Step 6 – Fill with fresh water for the second rinse – this is the only new water you need.
Step 7 – Cath the second rinse water and use as first rinse for next load.
Step 8 – Store the two water cans in the cockpit, until next load.
By following these steps, you only need to start with the full 15-18 gallons of water once. After that, you just need around 6-5 gal of fresh water for the final rinse cycle.
Again, this is when running the washer at Medium load capacity. I never did large, never needed it.
What About a Dryer?
You do not need a dryer aboard. At all.
Dryers are only efficient with a vent, and they use a lot of energy, and take up tons of space.

The combination washer/drier does not work well for drying – you end up with mostly wrinkled semi-damp clothes.
The lifelines aboard are perfect for drying clothes.
If you are worried about clothes getting blown away, or occasional rain, string some lines under the bimini cover and dry the clothes there.
It is what we did and our laundry always smelled clean and fresh, and sunny (if there is such a smell).
Washer Installation
We freed up space in one of the heads, by removing one of our composting heads (we had four aboard, you do not need four!).
You want the washer high enough, so it can drain into the sink. It is much better, than flooding the head floor and pumping out the water.
If you already have a toilet installed, just leave it in and secure the washer on top of the toilet.
Joe built a wooden stand, which the kids painted. The stand was bolted to the fiberglass (he used the holes from the composting head), and the washer was strapped on top, using the anchors for the head.
While we had it permanently attached to plumbing for a bit, I found it much easier to control the water and fill manually, so we ended up filling straight from the sink.
Laundry accessories and supplies.
You will need these. While you can find all sorts of supplies abroad, it might be best to get everything before your sail away, especially parts, tools and gadgets.
Check out our posts with essential boating gear:
Essentials @ no texting & tacking
Hose Adaptor
If you are planning on having the washer permanently connected to plumbing, thus allowing it to automatically fill with water, you might want to buy this adapter.
I have read that the one the washer comes with, does not provide a great seal. Here is the one people use instead.
Note: Since I used the faucet and the reserved water to fill, we did not need the washer permanently attached to plumbing.
Clothespins
These clothespins are sturdy enough to withstand the strong breeze aboard, and I like that they have two different-size loops, to help hang on different lifelines.
They will not rust (for a long time), and are not plastic, in case some end up overboard.
For more non-plastic must-haves: 25 Galley Gear Essentials (We Used All the Time)
Note: We dried most of our clothes on lines attached under the bimini.
Tips for hanging clothes, so they are not blown away, or gathered towards the stern:
- Start hanging right over a bow stanchion (the vertical poles along the life lines) and attach your first garment there.
- Overlap the next one on top of the first, and secure with a pin.
- Repeat with the remaining garments.
This way you only use half the pins and the first garment holds the rest, right over that first stanchion.
Water Catching Can
You will need two 5-6 gal cans, to catch the water from the wash.
I used buckets at first, but if we had a passage between doing laundry, buckets were terrible in the cockpit, even with the lid on. So, I switched to cans.
The washer hose fits right inside the small opening of the water cans and there are no water spills.
Think about how you will fill the washer with that heavy can. That’s why I am recommending one with the small leakproof spigot. Prop it on the washer and poor that way.
Note: I always ran the washer on medium water level. This was plenty of water, for around 6-7lb of laundry.
Laundry Bag
If doing laundry at a marina, you will need a large bag to transport it from the boat.
A dry bag is ideal, because it will not allow the clean clothes to become soaked during the dinghy ride back aboard.
Here is a useful post: 19 Best Boating Bags. Tips How to Use Them.
Do You Really Need a Washer Aboard?
Yes. And don’t let anyone convince you otherwise.
I have done my fair share of laundry by hand. With three teens aboard, I was not doing laundry in a bucket.
If you are always at marinas, you will be just fine using the marina facilities. Many have commercial washers.
Even though we always anchored, I would pay to use the washer and dryer at marinas, when washing bulky items – sheets and towels.
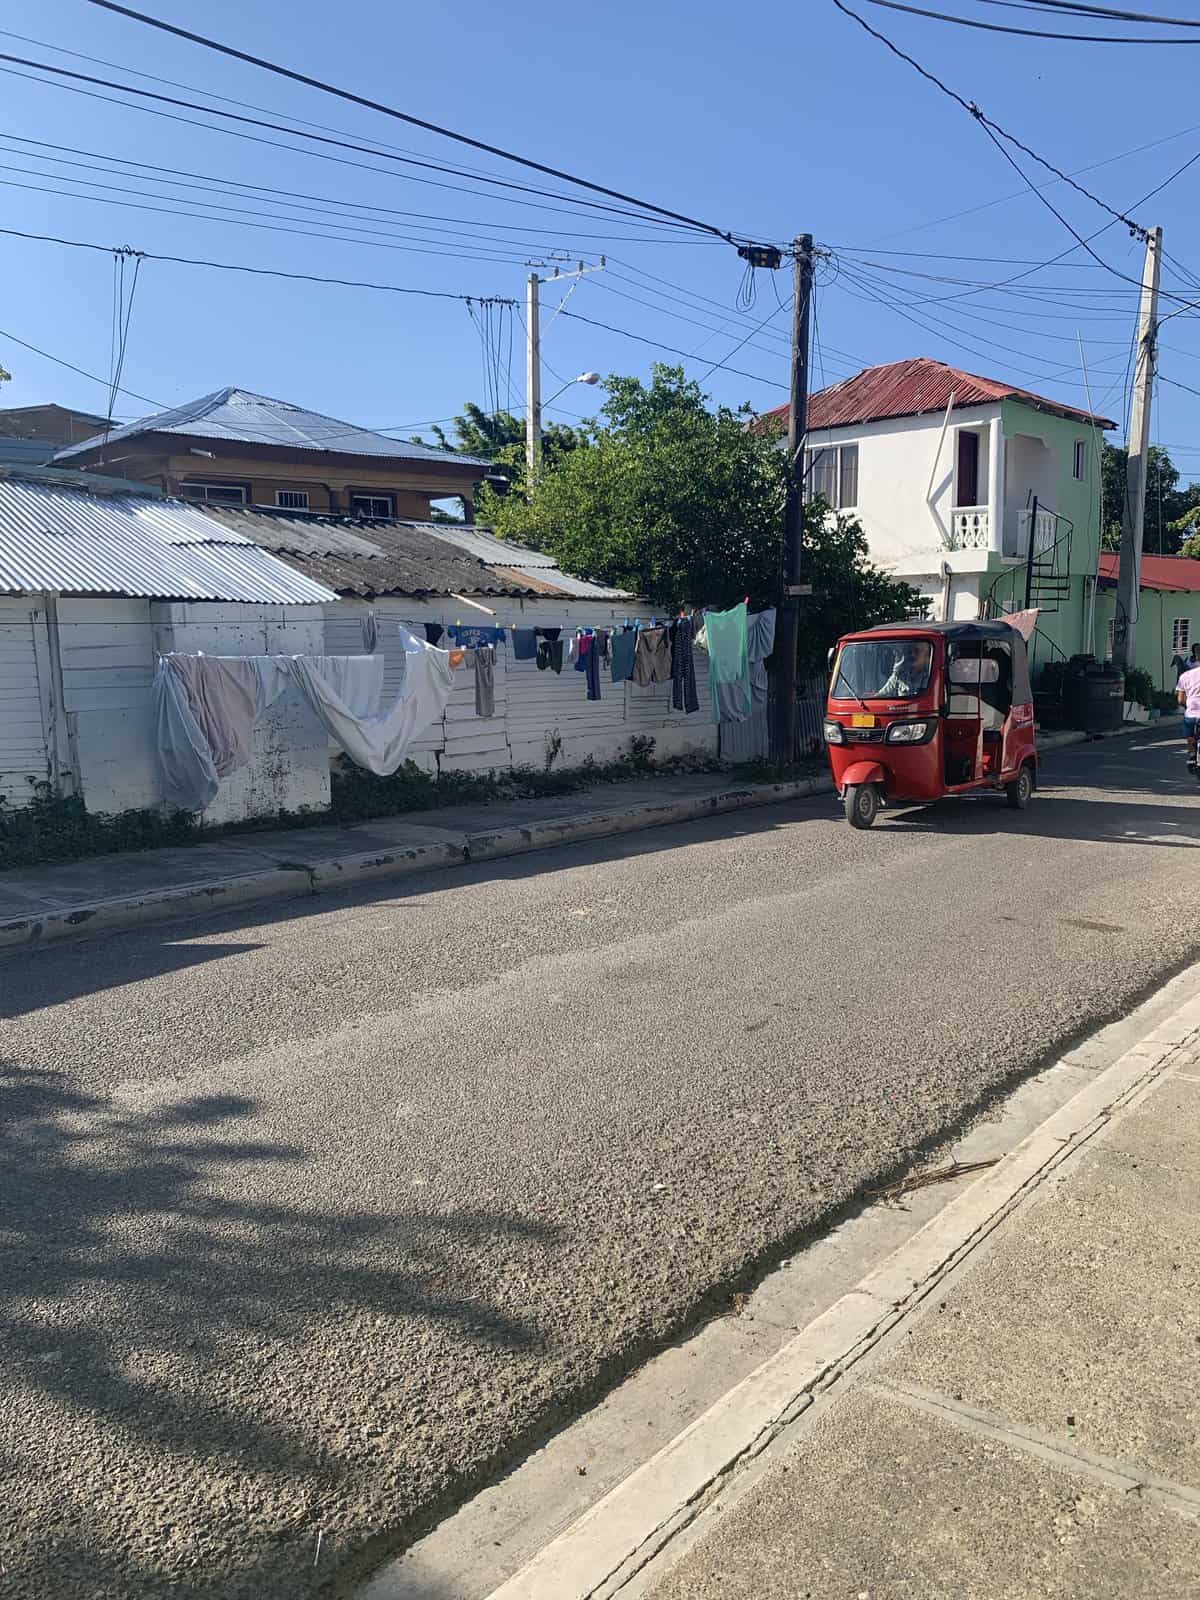
All of the cruising destinations we visited, had a local lady, in town, who would do laundry for a small fee. We have done that as well. The photo above is of our laundry, drying on Main Street in Luperon, DR.
Some More Tips for Successful Washing Aboard
I did not think it would take an entire post to describe doing laundry, yet I have even more to add, so here we go:
- Don’t do laundry under way – it is rocky, messy and splashy.
- Set an alarm for the times it takes to do each cycle.
- Keep the drain hose inside the catching can, so you don’t have to worry about spilling.
- A 5 gal can will catch the water from Medium load, but some might spill out, especially the sudsier first rinse.
- Reuse the collected water within 2-3 days, or bacteria will start growing inside and it will smell.
That’s it. I wish you many fresh clothes aboard.
More Great Everyday Boating Gear
19 Best Boating Bags. Tips How to Use Them.
9 Sailing Outfits for any Season and Reason
Comfortable Sailing Shoes for Every Boating Need